Certain large files are quite problematic to write to some media. In addition, when sending data by e-mail or transferring it using file-sharing resources, users often encounter file size limitations.

Necessary
7-zip
Instructions
Step 1
This problem is solved with the help of archiving programs. The easiest way is to simply pack the required data into an archive using the maximum compression mode. Unfortunately, some file types are difficult to compress. If you encounter a similar situation, split the file into multiple elements.
Step 2
If you need to split a group of files, copy them to a separate folder. This saves you the trouble of processing each file separately. Install the 7-zip program by downloading it from the official website of the developers.
Step 3
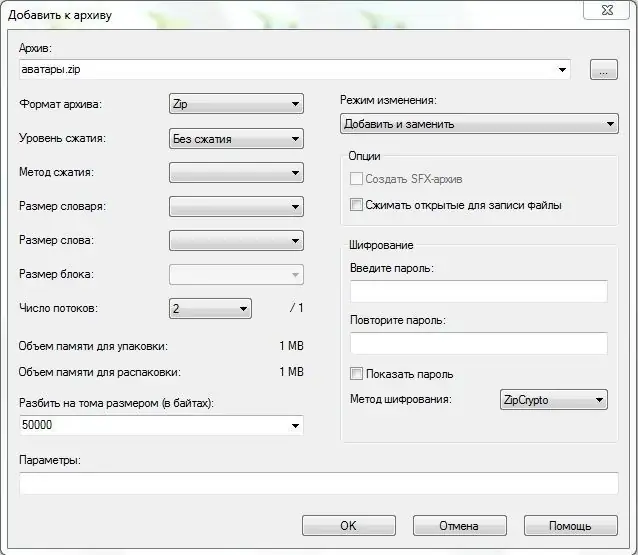
Right-click on the directory where the files to be archived are located. Hover your cursor over the 7-zip field and select Add to Archive. Enter the name of the future archive in the first field.
Step 4
Select the compression level for your files. When splitting a folder into items, you can use the "No compression" technology. Find the "Split into volumes" field. Set the maximum size for each element yourself. Its choice depends on the purpose of dividing the files into fragments. Please note that the size is given in bytes, i.e. to set the maximum size to 50 MB, you need to enter the number 50,000.

Step 5
After preparing the parameters, click the Ok button. Wait for the required number of archives to be created. Use the same program to put all the pieces together.
Step 6
Right-click on the first fragment of the archive. Go to the 7-zip submenu and select Extract Files. In the new window, specify the directory into which this archive will be unpacked. Click the Ok button.
Step 7
It should be noted that you can work with files without first extracting. To do this, go to the content of the first element and open the file you want. The program will automatically connect the necessary fragments and give you access to the selected information.


